
Roof vent leaks often come from cracked flashing, damaged caps, or deteriorated sealant, and should be repaired quickly to prevent costly water damage. Permanent fixes involve removing old sealant, resealing or replacing the vent, and securing it properly. Tarps or waterproof tape can serve as short-term solutions during bad weather. Annual inspections, debris removal, and keeping shingles flexible with roof restoration treatments like Roof Maxx can help prevent leaks from returning. Steep, high, or persistently leaky roofs are best worked on by professionals.
Your roof vents help keep your attic ventilated and prevent moisture buildup, but if they leak in the rain, they can become a liability. Any amount of water leaking through or around a roof vent should be dealt with as soon as possible to prevent damage and save you from needing to make costly repairs.
So what can you do about a leaky roof vent, and how can you prevent your vents from leaking next time it rains? This is one of the most common issues our dealers discover while they’re up on the roof doing a Roof Tune-Up, so we have plenty of experience fixing them.
In this guide, we’ll help you identify the source of the problem, provide a step-by-step repair process, and share tips for keeping your roof vents in great shape.
Roof Maxx isn’t designed to waterproof your shingles, but it can significantly enhance their flexibility and durability. Those are the same qualities that are crucial for preventing certain types of roof damage.
While Roof Maxx won’t directly stop a roof vent from leaking, it can extend the lifespan of the asphalt shingles surrounding the vents. This helps homeowners protect their investment and reduce the likelihood of leaks caused by brittle or cracked shingles near vent openings.
Here’s how Roof Maxx can make a difference:
Applying Roof Maxx before significant wear occurs ensures your roof is better equipped to handle the stresses of weather and aging, reducing the chance of water intrusion around sensitive areas.
The results speak for themselves, so why not check them out?

Many homes have more than one roof vent, and not all leaky vents are faulty in the same way. So before you can fix the issue, it’s important to determine where the leak is and what’s causing it.
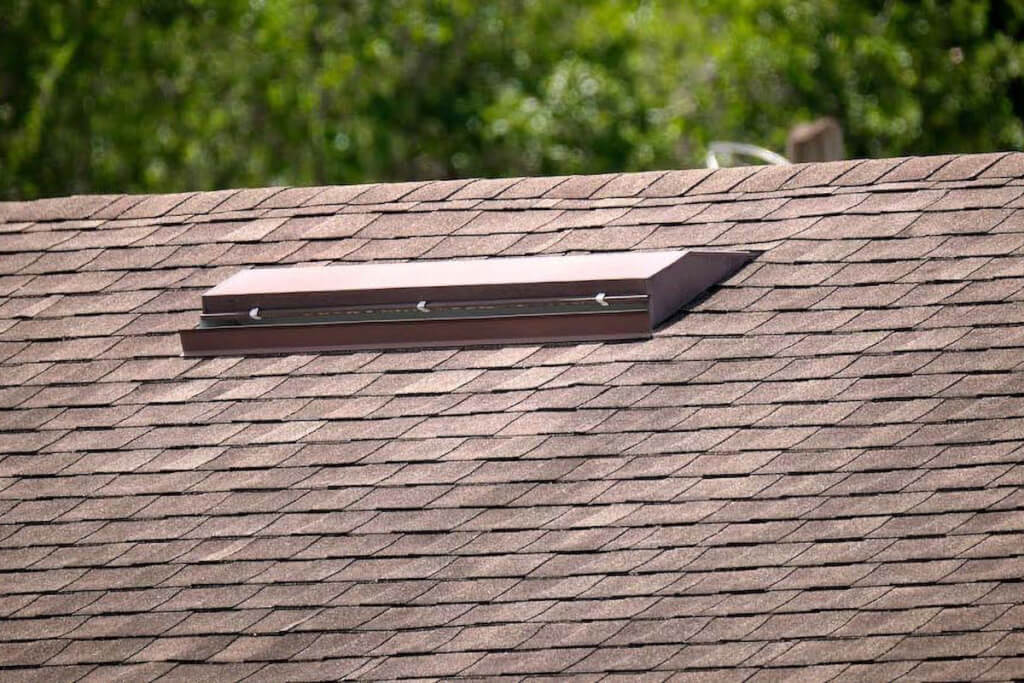
Common problems with roof vents include:
Before doing anything else, you should inspect the area around your vent during or after rainfall to pinpoint where the water is coming in. Once you’ve identified the source, you’re ready to gather the tools and materials needed for the repair.
While tackling a roof vent leak yourself can save money, it’s important to understand the potential risks of DIY roof repairs before you get started. In fact, we strongly recommend checking out our Roof Work Safety Guide before you decide if you want to handle it yourself.
It’s easier and more effective to hire a pro for so many reasons:
If you’re confident in your ability and have experience with roof repairs, or you’re a roofer yourself, a DIY approach may work out okay. That said, hiring a pro will always be the better option for complex jobs where it’s essential to make sure the job is done safely and effectively.
Learn More: Will a Roof Maxx Treatment Void My Shingle Warranty?
To fix a leaking roof vent, gather the following items:
Having these tools on hand will make the repair process smoother and safer.
Before you get up on the roof, check out our Roof Fall Protection Guide.
Working on a roof can be dangerous. If you do decide to try a DIY fix, make sure you follow these safety tips to minimize your risk:
And remember: if you’re not comfortable working on your rooftop or don’t have the necessary safety gear, don’t try! Instead, contact a professional roofer who can make sure the required repairs are performed safely and that your warranty isn’t voided.
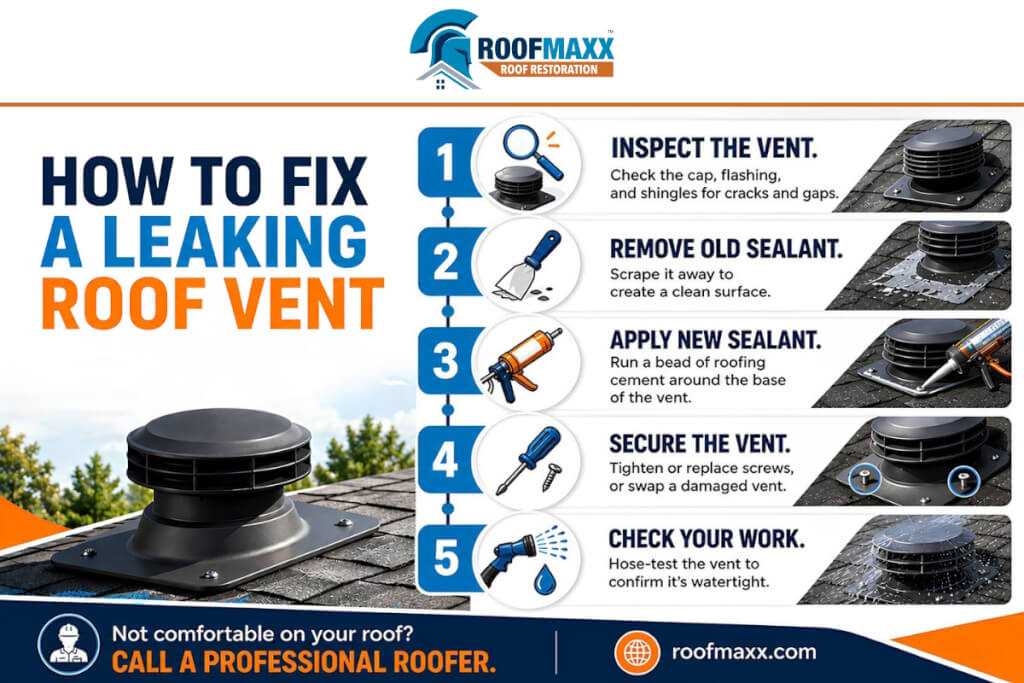
Follow these steps to repair your leaking roof vent:
Check for visible damage to the vent cap, flashing, or surrounding shingles. Take note of any cracks or gaps. It can be helpful to take pictures before you start any work in case you need proof later on.
Carefully scrape away the old sealant using a utility knife. Sealant adheres best to a clean surface, so you want to remove as much of it as you can without risking cutting into the roof or shingles around it.
Use a caulk gun to apply a generous layer of roofing cement or sealant around the base of the vent. Make sure to cover any cracks or gaps. Gently press down on the fresh sealant with a wet finger, then drag it along the seam to create a smooth, even seal.
Tighten or replace any screws, then confirm that the vent feels securely in place. If the vent itself is damaged, you’re better off just replacing it with a new one.
Inspect the area to ensure all gaps are sealed and the vent is firmly secured. Test for leaks by running water over the vent with a hose.
It isn’t reasonable or safe to get up on the roof in the middle of a bad storm, but sometimes, life just gets in the way and you can’t get to the repair for a little while. There are ways to protect the area and prevent further leaks temporarily. Here’s what you need to know to decide which approach is best.
Temporary fixes can buy you time, but they won’t solve the problems that caused your vents to leak in the first place. As soon as conditions allow, remove the temporary fix and follow the steps outlined earlier to seal or replace the vent. Permanent repairs ensure your roof remains leak-free in the long term.
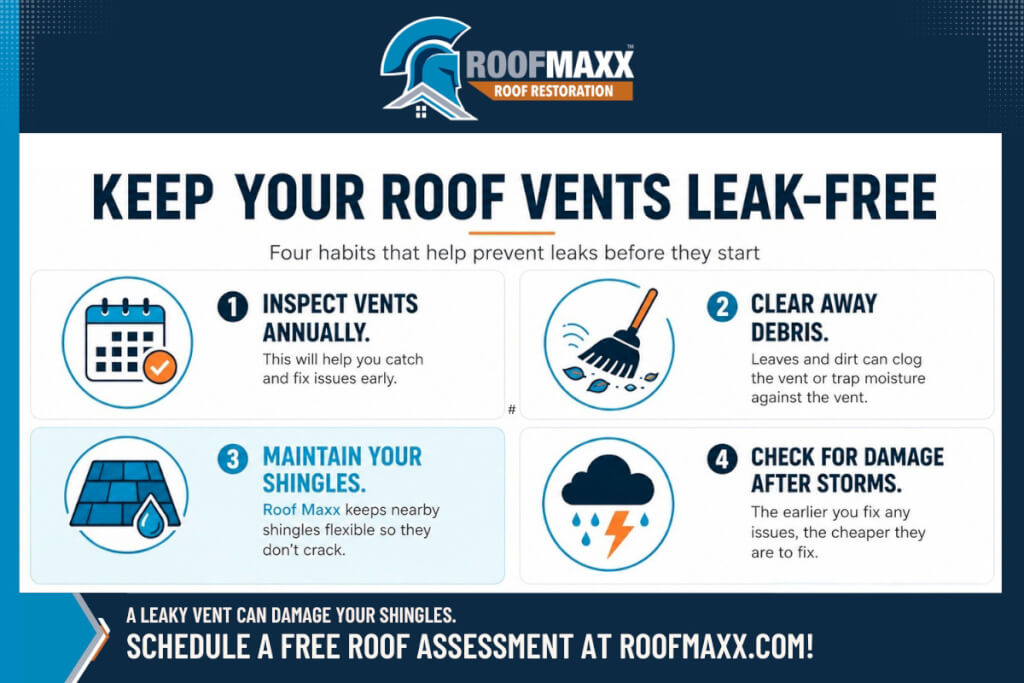
Regular maintenance can help prevent leaks from developing in the first place.
A good strategy should always include:
Learn More: Preventing vs. Fixing a Leaky Roof: Costs & Benefits
While many roof vent leaks can be fixed with a DIY approach, some situations call for professional assistance.
Consider hiring a professional roofer if:
Roofers have the expertise and tools to handle complex repairs and ensure your roof is in top condition.
Leaking roof vents can cause serious damage if left untreated, but addressing the problem quickly can save you time and money. Following the steps outlined in this guide can help you tackle them the right way and then put measures into place to prevent future issues.
And remember: keeping your entire roof in good condition reduces your risk of water damage! Find a Roof Maxx dealer near you to learn more about how our treatments can help extend the lifespan of your asphalt shingle rooftop for up to 15 years, at a fraction of the cost of a total roof replacement.
A vent that stays dry in light rain but leaks in a downpour usually has a small gap in the flashing or sealant. Light rain doesn’t push enough water in to reach it, but heavy, wind-driven rain forces water through the opening.
Yes, many vent leaks are a manageable DIY repair if the roof is safe to access and the damage is minor. Clearing the old sealant, resealing the vent, and securing it covers most cases. If you have a steep roof, persistent leak, or interior water damage, it’s best to call a pro.
A DIY repair often costs little more than a tube of roofing sealant, and in some cases, a replacement vent. Professional repairs vary with the damage and your roof’s accessibility, but they remain far cheaper than the water damage a neglected leak can cause.
Roof Maxx isn’t a waterproofing product, so it won’t seal your roof directly. It does keep the asphalt shingles around your vents flexible and less likely to crack, which reduces one common path for water to get in.
Check your vents at least once a year, and again after any major storm. Catching a cracked cap or worn sealant early is far easier than dealing with water that has already reached your attic.



With our five-year, transferable warranty, you’ll enjoy the peace of mind that your roof and entire home are protected.