Nearly half of all homeowners in the US deal with mold on windows and other surfaces. Treating the root cause and removing it right away is the best way to stay safe.
Mold usually develops as black, green, or gray spots along seams and edges. You can’t always tell if it’s unsafe just by looking—so you should wear gloves and use a respirator when removing it.
White vinegar, hydrogen peroxide, and EPA-approved cleaners like RMR-141 are highly effective at treating mold when used correctly. Bleach is less than ideal, and can damage surfaces.
To remove mold, apply your cleaning product of choice, then scrub the area gently to loosen it up. Dry the area with a clean towel or cloth, and repeat as necessary until the mold is all gone.
To stop mold from coming back, you need to address the root cause. Reducing indoor humidity, keeping your windows in shape, and addressing roof vulnerabilities can help. Roof Maxx can help prevent mold from growing on top of your house by acting as a natural fungicide that protects your shingles from future growth.
For about 47% of homeowners in the US, mold on windows and other surfaces isn’t a new problem—it’s something they’ve seen before. When it crops up in bathrooms or kitchens or along your windows, it often seems minor at first, but it’s a warning sign that you have too much moisture in your home.
Treating mold promptly is important because it can look unsightly, make you seriously sick, and even destroy your windows over time. Below, you’ll find everything you need to know to treat it and prevent it from taking hold (and no, bleach isn’t always the answer).
Roof leaks along your flashing can eventually infiltrate your walls, creating a breeding ground for mold. If your asphalt shingles are old, they will lose the ability to channel water away from vulnerable areas. Roof Maxx rejuvenates them so you have maximum protection. Learn how it works here.
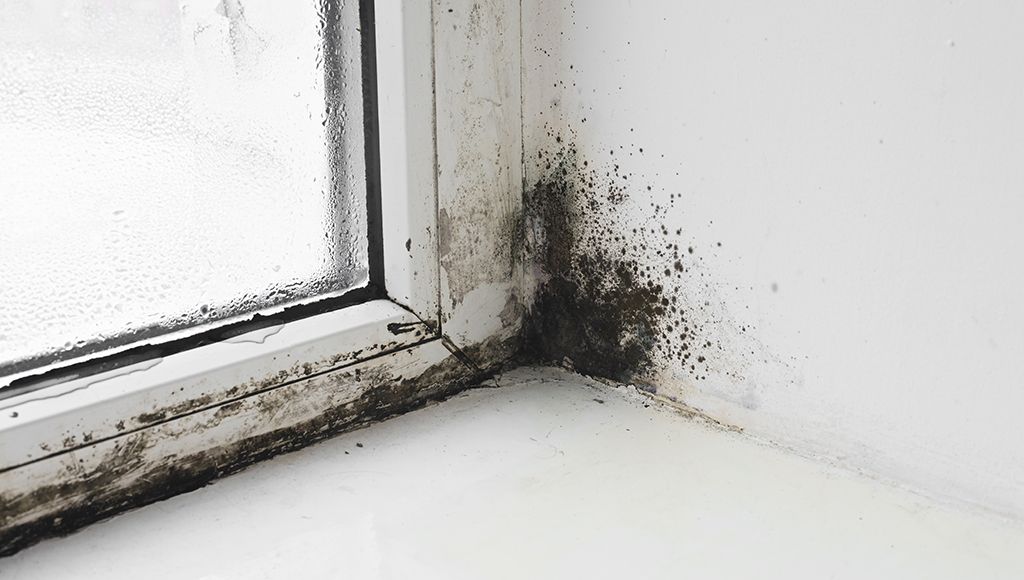
Black mold built up around a window and a leaky wall.
Identifying Mold on Your Window
First, let’s talk about what mold really is: a group of fungi that thrive in damp, poorly ventilated spaces. Scientists have discovered over 100,000 types in total, but you’ll typically only find 10 or 20 specific types in your home. Some are relatively harmless, while others—like black mold—can be very dangerous.
Signs of Mold Growth
Molds typically develop as black, green, or gray spots along window sills, frames, and seams where the frame meets the glass. A musty smell near windows may also point to hidden growth behind surfaces.
Other signs include:
Peeling paint or bubbling wallpaper near windows
Warped wood frames or discolored drywall
Condensation that seems to linger on windows or walls
Increased allergy symptoms or respiratory irritation indoors
These symptoms aren’t always caused by the mold itself, but signal a moisture problem instead. And where there’s excess moisture, mold is rarely far behind.
Why Mold Forms on Windows
Condensation from temperature differences or leaks around the window frame create an ideal environment for mold growth. When you shower, bathe, or wash dishes, moisture evaporates into the air, which is why bathrooms and kitchens are one of the most common rooms for mold to grow in.
Improperly sealed or fitted windows can also contribute to the problem, either because they allow the damp in or because they develop leaks. Fixing problems like these and ensuring proper ventilation can help you prevent mold from coming back after you remove it.
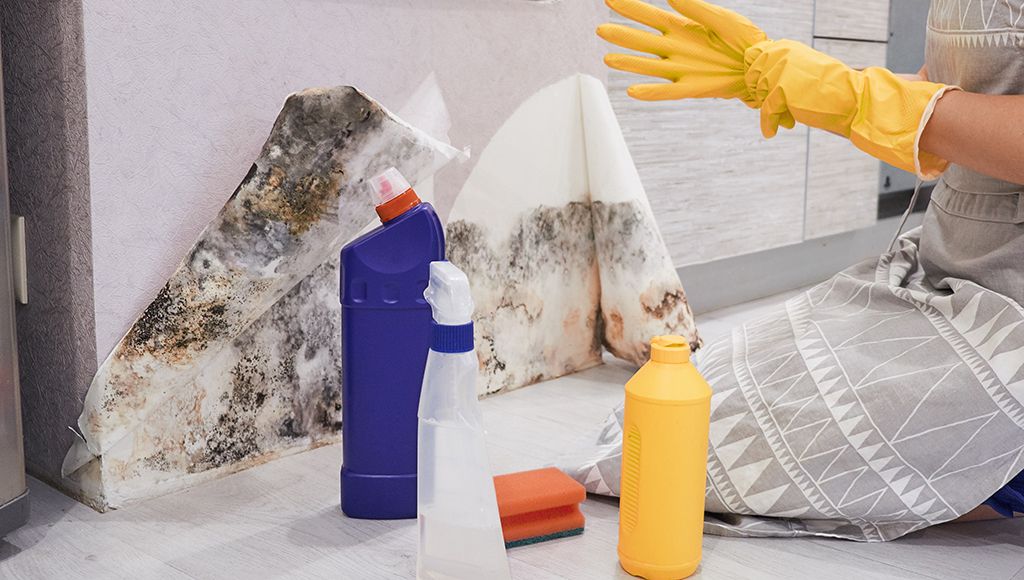
A woman puts on gloves before cleaning up mold.
Safety Precautions Before Removing Mold
You can’t always identify whether mold is dangerous by appearance alone. That’s why it’s best to err on the side of caution and take steps to protect yourself from exposure before you start.
Gather Protective Gear
Mold spores travel on the air and stick to surfaces, so you always want to take steps to prevent inhaling it or making physical contact with it in any way. To stay safe:
Wear gloves to protect your hands from mold spores and cleaning agents.
Wear a mask to prevent accidental inhalation, especially in areas with significant buildup.
Wear safety goggles to protect your eyes from spores and splash injuries.
Ensure good ventilation by opening windows or using fans to increase airflow in the area.
An N95 respirator mask will provide the best protection from spores. Regular hospital-style face masks, bandannas, and other DIY solutions aren’t effective because they let too much air in at the sides.
Choose Safe Cleaning Products
For best results, choose a cleaning product with a proven ability to kill mold. Stay away from bleach unless you have no other option—it’s corrosive, won’t work on porous surfaces, and leaves behind dead spores that can still trigger allergies.
Try these alternatives instead:
White vinegar is an effective natural cleaner that kills most types of mold.
Hydrogen peroxide works well on hard surfaces and kills mold spores.
For severe cases, use an EPA-approved mold-killing cleaner like RMR-141.
For extreme cases (e.g., mold in walls or soft surfaces), consult a mold remediation expert before you start. It may not be safe to try and clean it on your own.
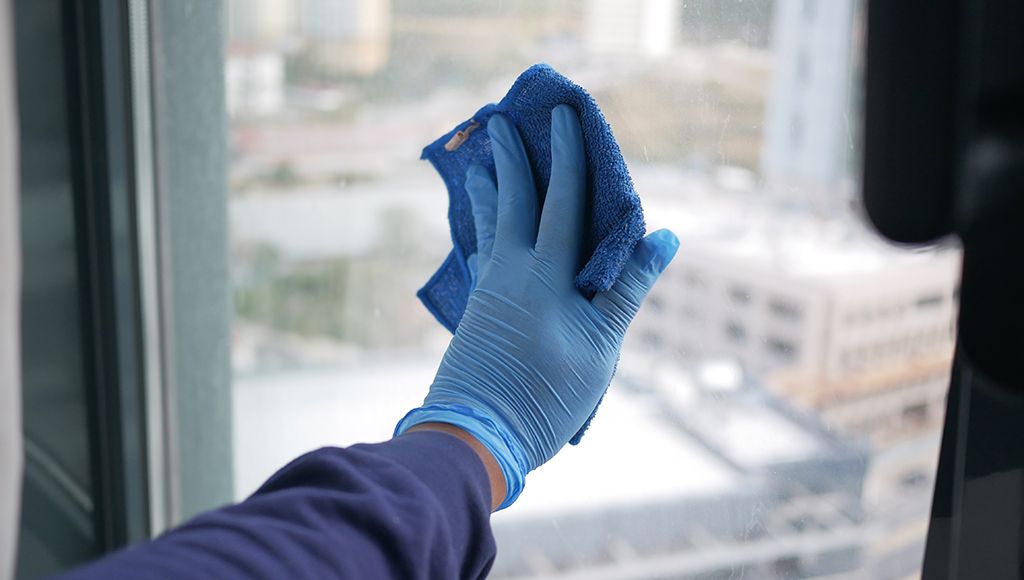
A person cleans a window with a soft blue microfiber cloth.
Step-by-Step Guide to Removing Mold
Step 1: Prepare the Area
Put on your respirator, gloves, and goggles before you start.
Remove any window coverings (curtains, blinds) and set them aside for cleaning or washing.
Place a drop cloth or towel beneath the window to catch any drips or debris.
Step 2: Apply Cleaning Solution
If you use white vinegar: Spray undiluted vinegar directly onto moldy areas. Let it sit for at least an hour for the best results.
If you use hydrogen peroxide: Spray hydrogen peroxide directly onto the mold. Let it bubble and sit for 10 minutes.
If you use a commercial cleaner: Follow the instructions on the product you choose.
Step 3: Scrub & Wipe
Use a soft-bristle brush, old toothbrush, or sponge to gently scrub the moldy areas.
Wipe the window and frame down thoroughly afterward with a clean, absorbent cloth.
Rinse the area with clean water to remove any stubborn mold or residue.
Repeat steps 2 and 3 until the area is free from mold.
Step 4: Dry the Area Thoroughly
Use a dry cloth to absorb any leftover moisture.
Keep the window open or use a fan to ensure all surfaces are completely dry.
A woman stands in the kitchen smiling--her window is totally ok!
Preventing Mold from Returning
Addressing the root cause of moisture is the only way to stop it from recurring, but this isn’t always an easy task. If you suspect a roof leak or more serious problem, like mold in your walls, it’s best to call in a professional remediation team. Otherwise, follow the next few steps.
Reduce Indoor Humidity
Use dehumidifiers in the bathroom, kitchen, basement, and other high-humidity areas of your home to lower the level of moisture in the air—especially during the rainy season.
Run exhaust fans in your bathroom or kitchen to increase ventilation. On dry days, you can open windows to improve air flow, but it’s best to avoid this if it’s foggy or damp.
Don’t bother with moisture removal gimmicks, like Damp Rid, or DIY solutions like rock salt and baking soda. They’re ineffective and aren’t adequate for treating whole rooms or homes.
Regular Window Maintenance
To keep your windows in top shape, follow these best practices:
Clean your windows and sills regularly (once a week).
Wipe down the frame with mold killer at regular intervals, if necessary.
Inspect windows and frames for gaps or damage that might allow water in.
Check carefully for misalignment, leaks around the frame, or an incomplete seal when each window is shut. All of these can contribute to mold growth, so if you suspect a problem, have it looked at right away.
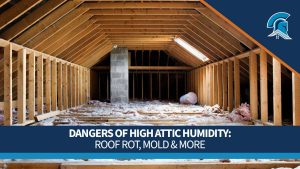
Roof Maintenance & Mold Prevention
Roof leaks can lead to excess moisture, which can eventually infiltrate your walls and even leak down around entry points, including your windows. This is a major contributor to mold growth. Check carefully along areas where surfaces and materials meet, like the edges of your roof, to spot minor leaks.
Roof Maxx helps extend the life of your aging asphalt shingles by making them flexible enough to expand and contract with the weather again. This helps direct water into your gutters and downspouts, which can indirectly lower your risk for leaks and mold. The oils in Roof Maxx also act as a natural fungicide, which prevents mold and algae from accumulating on your roof or shingles.
A Roof Maxx dealer stands by a branded van, looking up at a roof.
Prevent Mold From Spreading to Your Roof With Roof Maxx
If mold develops on your windows, it’s important to address it promptly. Following the steps in this guide will help you safely remove it from your windows and other surfaces, but resolving the root cause of high humidity is the only way to effectively prevent it from coming back.
For maximum protection, remember that your roofing system is your home’s first line of defense against moisture and the elements. Roof Maxx contains a natural fungicide that can help prevent moss and algae from spreading to your shingles from nearby structures or trees. Connect with a dealer in your area to get a free quote.
George Karakitsios owns the website and marketing technology behind Roof Maxx. He has spent more than 12 years building web experiences for homeowners and Roof Maxx customers.