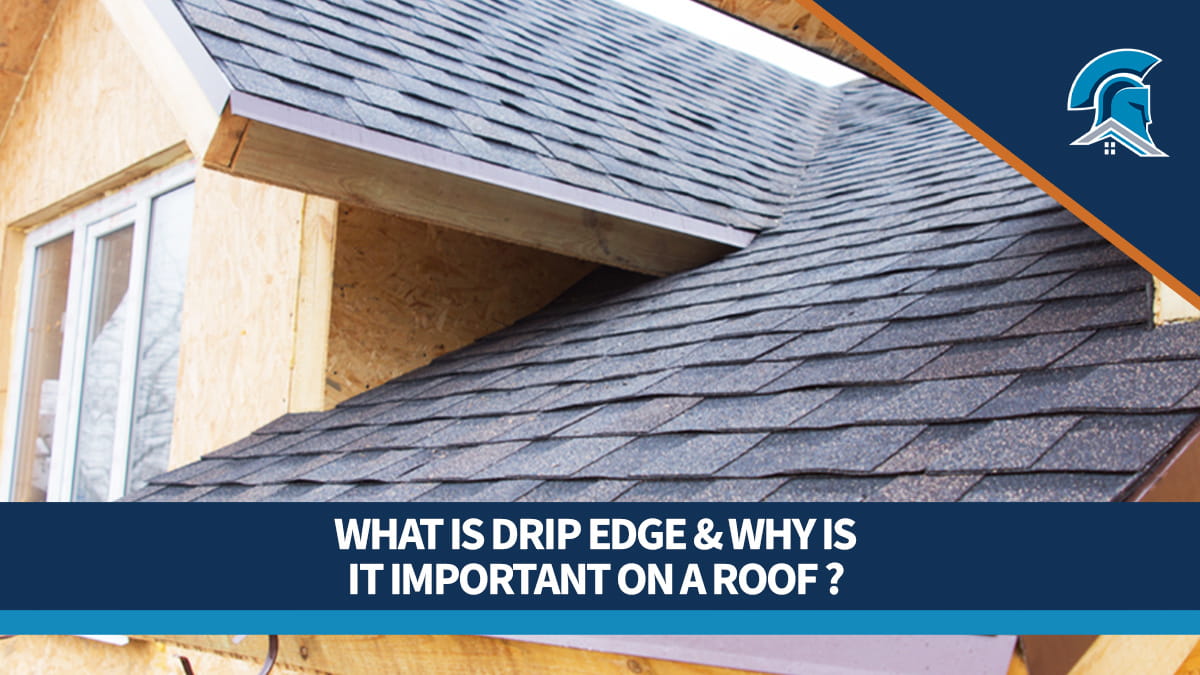
Drip edge is a type of flashing that protects the edges of your roof and shingles from water damage, ice dams, and pests. When properly installed and maintained, drip edges help prevent leaks, structural damage, early failures, and other costly repairs. Most drip edges are made from a durable material like aluminum, copper, or steel.
| Time to Read | 6–8 minutes |
| What You’ll Learn |
|
| Next Steps |
|
Drip edge is one of the most essential components of a roofing system, but it’s also one of the easiest elements for homeowners to overlook. When properly installed, it can stop water runoff and moisture from seeping down into your fascia, soffit, shingles, and walls.
Below, you’ll learn how to choose the right type for your home, install it properly, and fix or maintain it over the years. We’ll also tell you how Roof Maxx treatments help support the work your drip edges do by making your shingles flexible again so they can properly shed water.
In technical roofing terms, “drip edge” is just a fancy word for a specific type and style of flashing. Like most other types, it’s made from rugged, weatherproof materials that help lock out moisture and protect your home from moisture, pests, and the elements.
For maximum protection, drip edge flashing should be installed along all exposed roof edges, including your eaves, gable ends, and rake edges. To protect your home, it must be measured, cut, and properly installed to fit your roof.
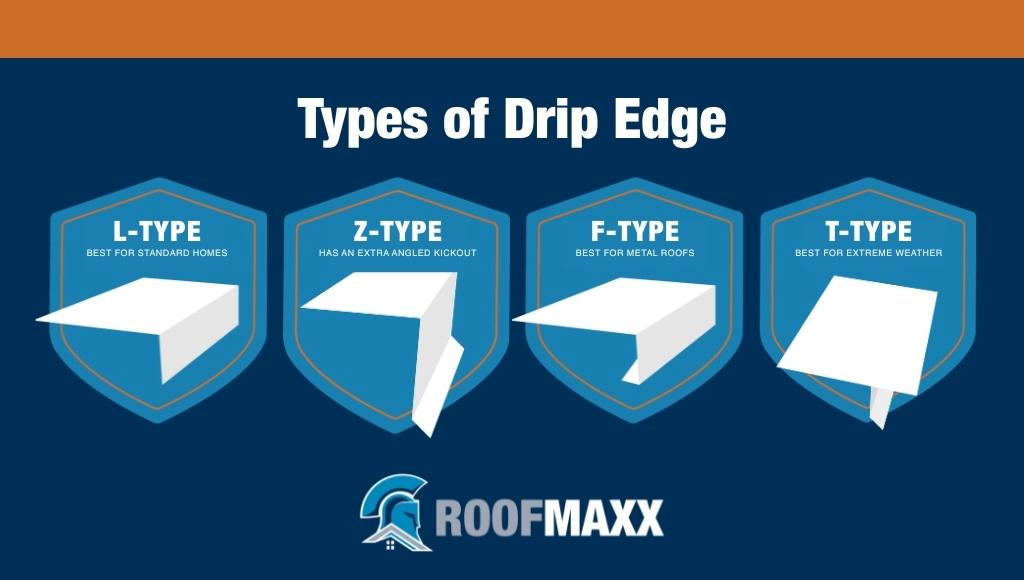
Drip edge comes in three main types: L-type, Z-type, T-type, and F-type. The terminology can get a bit confusing here because there’s no universal naming convention, so we’ve attached a handy graphic and a description of each type here.
A number of companies across North America offer custom-fabricated drip flashing for unique roofing setups, like heritage architecture or cornice molding. This isn’t practical for most homeowners because it’s so expensive and challenging to design, but it can be helpful if your home isn’t a good fit for other options.
Most modern building codes require drip edge flashing to be made from durable, corrosion-resistant metal like aluminum, galvanized steel, or copper. These materials are now industry standard across the U.S. thanks to their long lifespan and reliability.
Plastic or rubber-based systems were much more common in the early 2000s, but they’ve largely fallen out of favor in residential roofing. Today, non-metal alternatives like these are really only used for commercial roofs or as a stop-gap measure for temporary repairs.
| Material | Pros | Cons | Best For |
|---|---|---|---|
| Aluminum |
|
|
Most residential roofs |
| Galvanized Steel |
|
|
Areas where durability matters (e.g., high winds) |
| Copper |
|
|
High-end homes and historic restorations |
| Vinyl/Plastic |
|
|
Low-budget or temporary fixes |
| Rubberized Membranes |
|
|
Specialized applications only |
For the vast majority of homeowners, aluminum drip edge flashing is an effective, durable, and reliable choice that won’t break the bank. You’re better off choosing galvanized steel if you live in areas with frequent hurricanes or extreme temperatures.
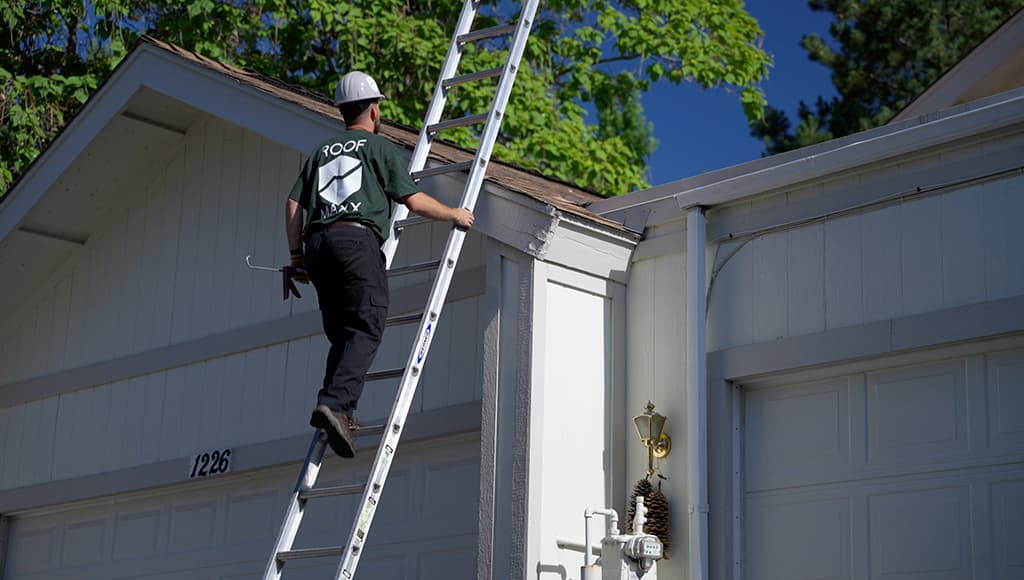
While you can technically install a new drip edge on an existing roof, it’s much more common for it to be installed during initial construction. The installation process itself is fairly complicated and involves a lot of meticulous planning, so it isn’t really a DIY-friendly project (unless you’re already a pro!).
As always, we don’t recommend doing roofing work by yourself. Not only can climbing on top of your own rooftop be dangerous, but it also runs the risk of voiding important warranties. But if you must climb up there for some reason, be sure to read this guide on staying safe first.
The edges of your roof must be clean and free from damage like fascia rot or warped decking. If you have issues like these, you’ll need to have them fixed first.
Drip edge flashing is laid along the roofline in a way that causes it to extend out horizontally over the edges of your roof. It should typically overlap the roof deck by at least 2 inches at the seams for optimal protection.
Roofing nails or screws placed approximately 12–16 inches apart are driven through the drip edge and the roof deck. This secures the drip edge in place and makes it more resistant to wind shear and other environmental forces.
Caulk or roofing cement is carefully applied to any areas that overlap or where two different materials meet (e.g., the edge of the drip flashing) to prevent leaks. Water only needs a few millimeters of space to leak down into your roof and home, so don’t skip this step!
Once the job is complete, your roofer should carefully check that any drip edge is properly aligned and securely fastened into place. Testing your drip edge, whether it’s new or old, is fairly simple: use a garden hose to simulate rain, then follow the path of the runoff carefully.

Drip edge is relatively low-maintenance, and in most cases, you can expect it to last several decades. Clearing out any leaves, dirt, and ice buildup is the best way to maintain it from the homeowner’s perspective because this is what traps moisture along the edges of your roof.
Regular inspections will always be your best defense against drip edge problems. Just taking the time to carefully look for issues like lifting, shifts in alignment, detached panels, and rust now and again will help you spot minor issues before they turn into costly damage.
Your drip edge and asphalt roof work together as a system. When one area begins to weaken or fail, the other will eventually follow suit. Issues like curling shingles, granule loss, and cracks or breaks around the edges of your roof will let water bypass your flashing and leak directly into your roof or your home.
The best way to avoid these issues is to keep your asphalt shingles in good condition by scheduling a Roof Maxx treatment. Our all-natural, eco-friendly solution can:
See how the treatment works right now, or find a dealer in your area to learn more.
Proper installation is the best defense against most drip edge problems, but all systems will eventually need repairs or replacement. Keeping a close eye out for loose sections, corrosion, and misalignment can help you spot and fix issues before they get worse.
Lost drip edges are typically a result of improper fastening, age-related wear and tear, hail damage, and the harmful effects of UV rays. Once problems like these start to develop, it becomes easier for high winds and rain to pull your drip edge off completely.
Clear away any debris, dirt, leaves, or shingle granules to ensure a clean work area.
Next Steps:
If any fasteners remain exposed after securing, apply a small dab of roofing caulk or another rust-proof waterproof sealant over them. Replace it whenever the flange is totally off, rusting out, or almost off.
Misalignment and gaps are usually the result of improper installation, roof movement caused by temperature changes or settling, or missing or poorly installed underlayment. These issues can allow water to sneak behind the drip edge over time.
Start by inspecting beneath the roof edge for any signs of water stains, dampness, mildew, or mold. This is a textbook symptom of water seeping behind the drip edge.
Next Steps:
For very minor gaps, you can apply roofing cement to temporarily lock out leaks and prevent damage, but this is usually temporary at best. Replace it if water has been getting behind the drip edge for some time, if the fascia or underlayment has failed, or if the drip edge is significantly misaligned.
Corrosion typically occurs when galvanized steel or copper ages and its protective coating wears down, especially with constant exposure to moisture. Unlike the often desirable patina that some metals develop over time, both rust and corrosion will weaken your drip edge over time.
Inspect the affected section to determine whether the rust is surface-level (small spots) or severe (multiple or larger spots) first. How you proceed will depend on what you find.
Next Steps:
Check your roof and gutters regularly to ensure they’re clear to prevent further moisture build-up and rust. If the metal is pitted, flaking, has holes, or is substantially weakened by the rust, it’s generally better to replace the whole section with new material.
Drip edge may not be the most exciting part of your roof, and it won’t win you any awards for curb appeal, but you’re almost guaranteed to learn a very expensive lesson if you skip or neglect it. Water that leaks in under your flashing will eventually enter your home and cause major structural damage.
Want even better protection? Pair proper roof care strategies like drip edge maintenance with Roof Maxx’s innovative, eco-friendly roof rejuvenation treatment.

With our five-year, transferable warranty, you’ll enjoy the peace of mind that your roof and entire home are protected.